

Shop Details
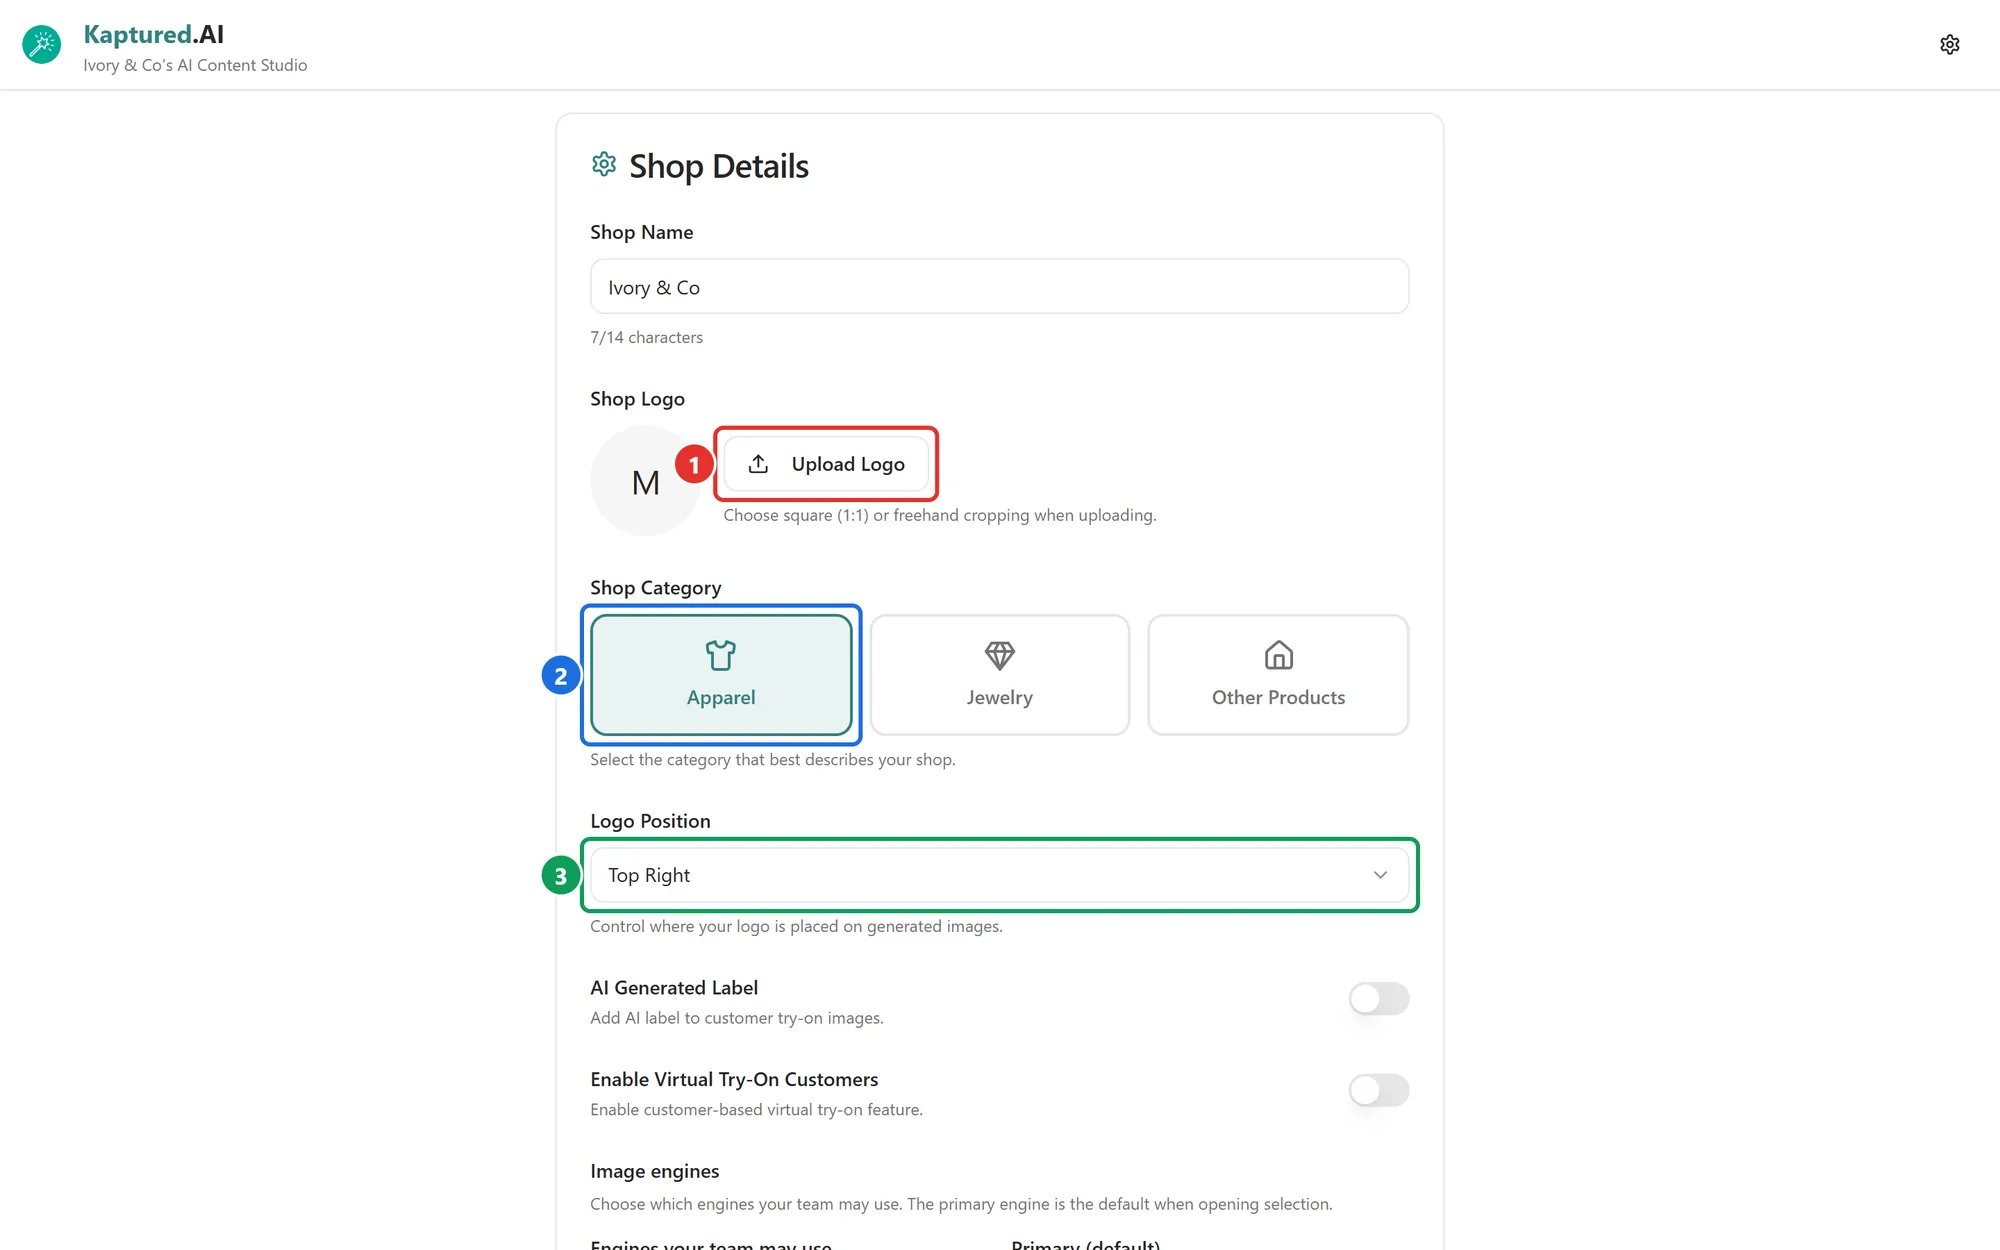
Shop Details: Upload Logo (1), Shop Category (2) and Logo Position (3).
Shop Name
Up to 14 characters. The counter under the field shows how many you’ve used. A shop name is required.Shop Logo
Your logo is used for the with Logo download options.- Click Upload Logo (1) and pick an image (JPEG, PNG, WebP, AVIF or HEIC).
- In Crop Logo Image, choose a Mode: Square (1:1) or Freehand (any shape). The smallest crop is 100×100 pixels.
- Click Confirm Crop & Upload.
Shop Category
Choose the option that best describes what you sell (2). This changes the steps in the AI Photo Studio, so set it before you start.
For Other Products, pick a type: Furniture, Food Product, Restaurant, Mobile or Custom (type your own, for example “electronics”).
Logo Position
Where your logo goes on with Logo downloads (3): Top Right (default), Top Left, Bottom Right or Bottom Left.AI Generated Label
When on, adds an “AI generated” label to Virtual Try-On images of your customers. Off by default.Enable Virtual Try-On Customers
Apparel shops only. On by default. Turns on the Style Customers pages. See Styling Customers with Virtual Try-On. Switching to any other category turns it off.Image engines
Choose which image engines can be used in your shop, and which one is picked by default.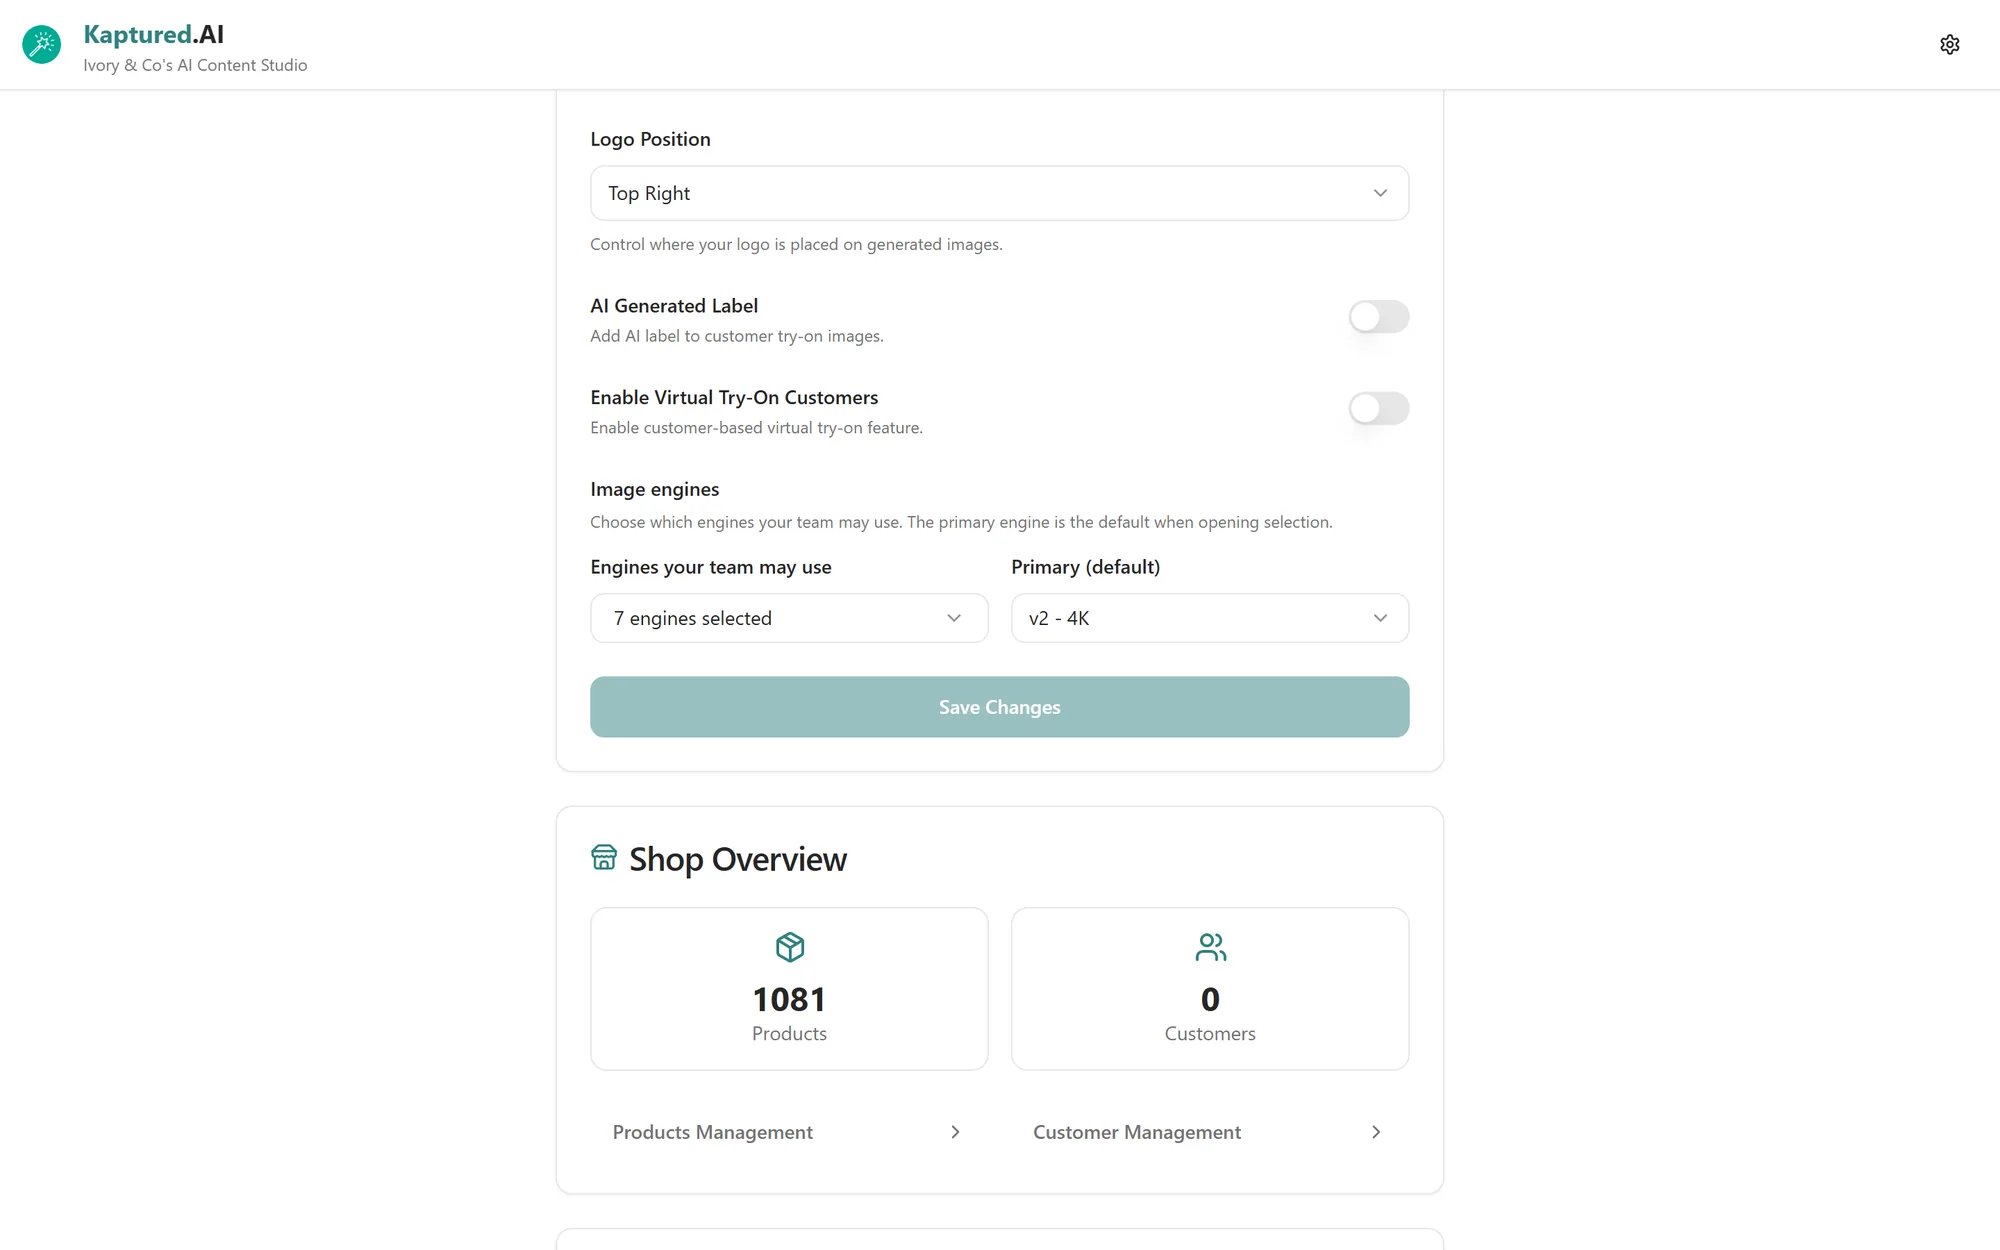
Image engines and Shop Overview, further down the page.
- Engines your team may use: a grid of engines (v1, v2, v3) by resolution (1K, 2K, 4K). Each allowed cell shows its cost in credits per image. Click a row or column header to toggle the whole row or column. At least one engine always stays on.
- Primary (default): the engine that’s preselected in the studio’s Final Settings.