

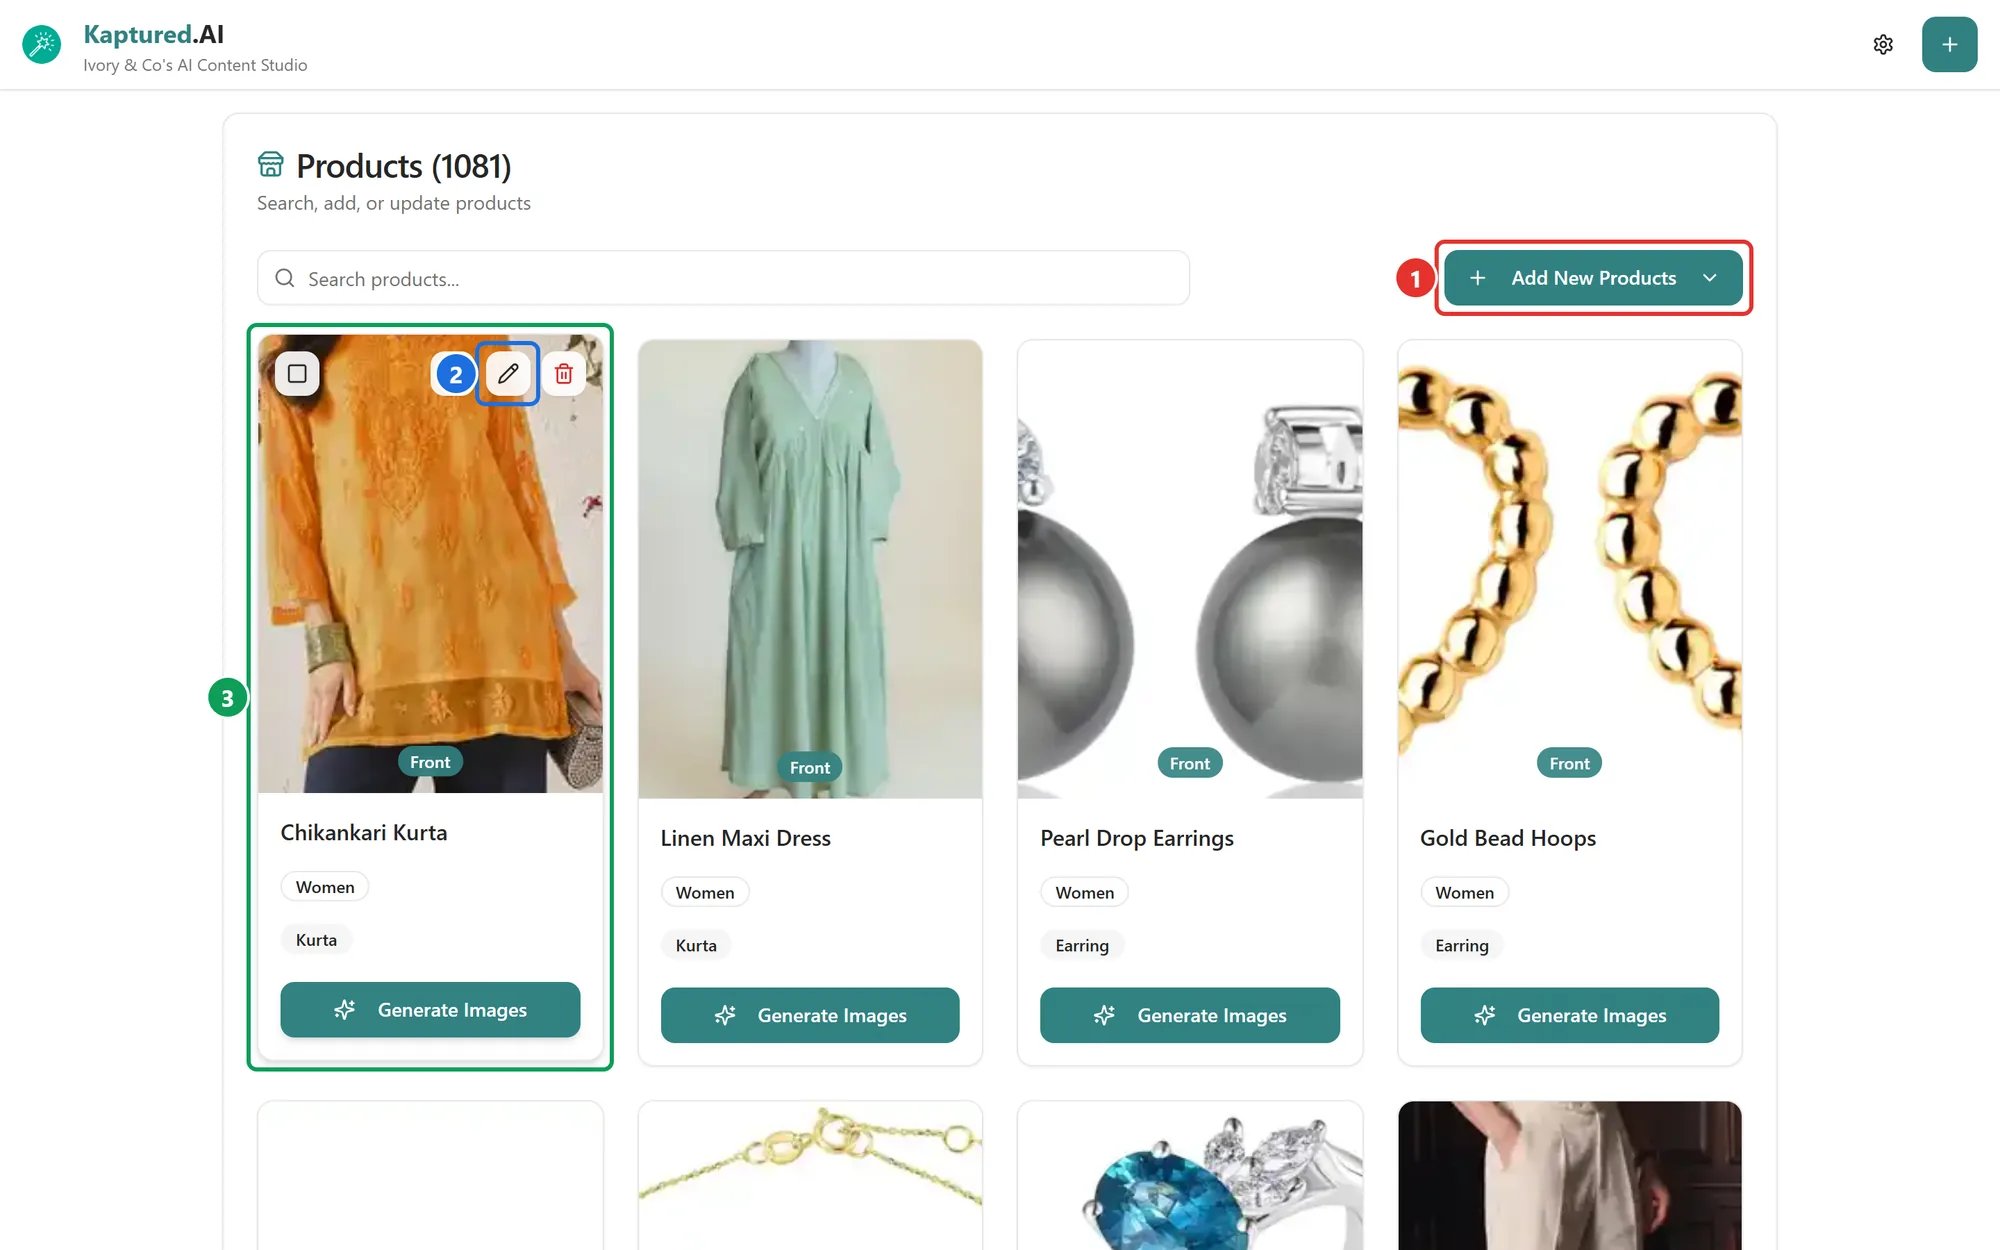
Products Management: Add New Products (1), the hover buttons including Edit product (2), and Generate Images (3).
Find a product
- Search products… searches by product name.
- AI Search (paid plans) finds products by description, by a photo, or both. Type something like “red embroidered kurta”, upload a photo, or combine the two, then click Search Products. While it’s on, you see AI Search active; click the X to clear it.
What a product card shows
Each card shows the product’s photos (use the dots to switch between them) and badges for price, For, categories, stone type, colors and sizes. Hover a card for three buttons:- View image: full-screen view of the photos, with download.
- Edit product (2): opens the product form. This is also where you add extra details (description, price, colors, sizes).
- Delete product: deletes it after you confirm.
Start a photoshoot from a product
Click Generate Images (3) on the card. The AI Photo Studio opens with that product selected. See Your First Photoshoot.Delete products
- One product: hover the card, click Delete product, then Delete.
- Several products: tick the checkbox on each card (or Select all on page), then click Delete in the toolbar.