

How the page is laid out
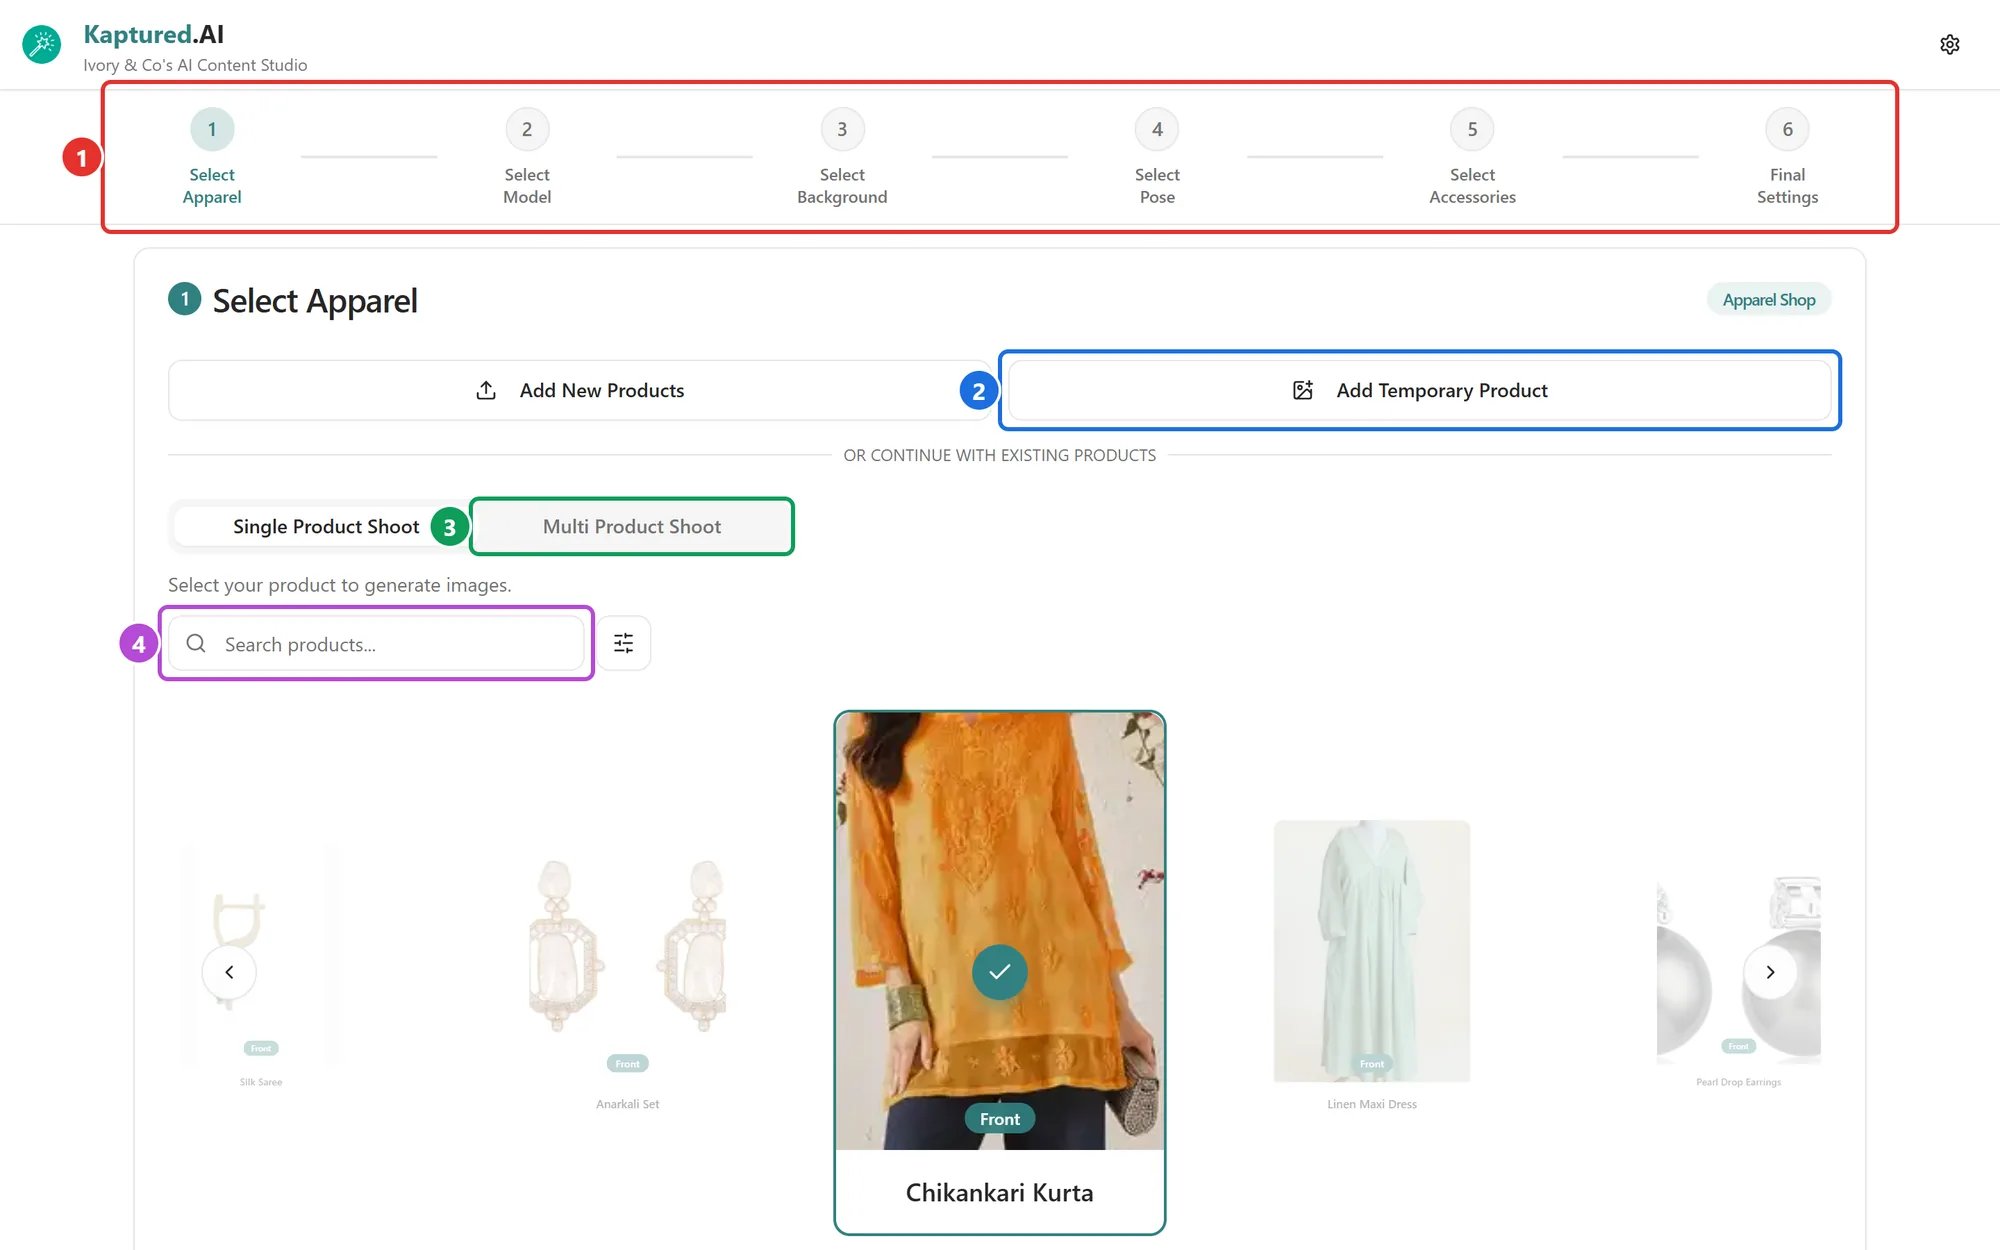
The top of the AI Photo Studio: the steps (1), Add Temporary Product (2), Multi Product Shoot (3) and product search (4).
Under the steps is Generations, where your results appear.
Step 1: Select your product
Choose Single Product Shoot and click a product. You can search with Search products… (4), filter by category, color or size with the filter button, or jump to your newest with Go to Latest Product. To shoot up to 3 products together on one model, use Multi Product Shoot (3). See Group Shots.Try a product without saving it
Click Add Temporary Product (2), choose photos, then fill in Product Name, For and Category in Temporary product details. Temporary products work like normal ones in the studio but aren’t saved to your catalog.Step 2: Select a model
Pick a face from the model library (filter by All, Male, Female or Kids), let the AI choose, or upload your own. Adjust age, hairstyle and makeup under Face Styling. See Choosing a Model.Step 3: Select a background (clothing)
Browse around 90 backdrops in Studio, Outdoor, Festive and Indoor, describe one in words on the Text tab, or upload your own. See Backgrounds and Poses. Jewelry shops pick a Template here instead. See Jewelry Templates.Step 4: Select a pose
Pick a pose by view (Front, Side, Back and so on), use one of your saved pose styles, or describe one. Choose an expression: Neutral, Smiling or Laughing. See Backgrounds and Poses.Step 5: Select accessories
Add footwear, bags, earrings and more, or click Let AI Choose Accessories. See Accessories.Step 6: Final settings
Choose focus, lens look, Aspect Ratio and Image Engine. The engine and resolution decide the credit cost. See Final Settings and Image Engines.Step 7: Generate
- Click Generate 1 image of this . (With several engines selected, you get one image per engine.)
- The Confirm Generation dialog shows how many credits it will use. Under Selected for reference (1), untick any product photos you don’t want the AI to look at; at least one must stay ticked.
- Click Generate (2).
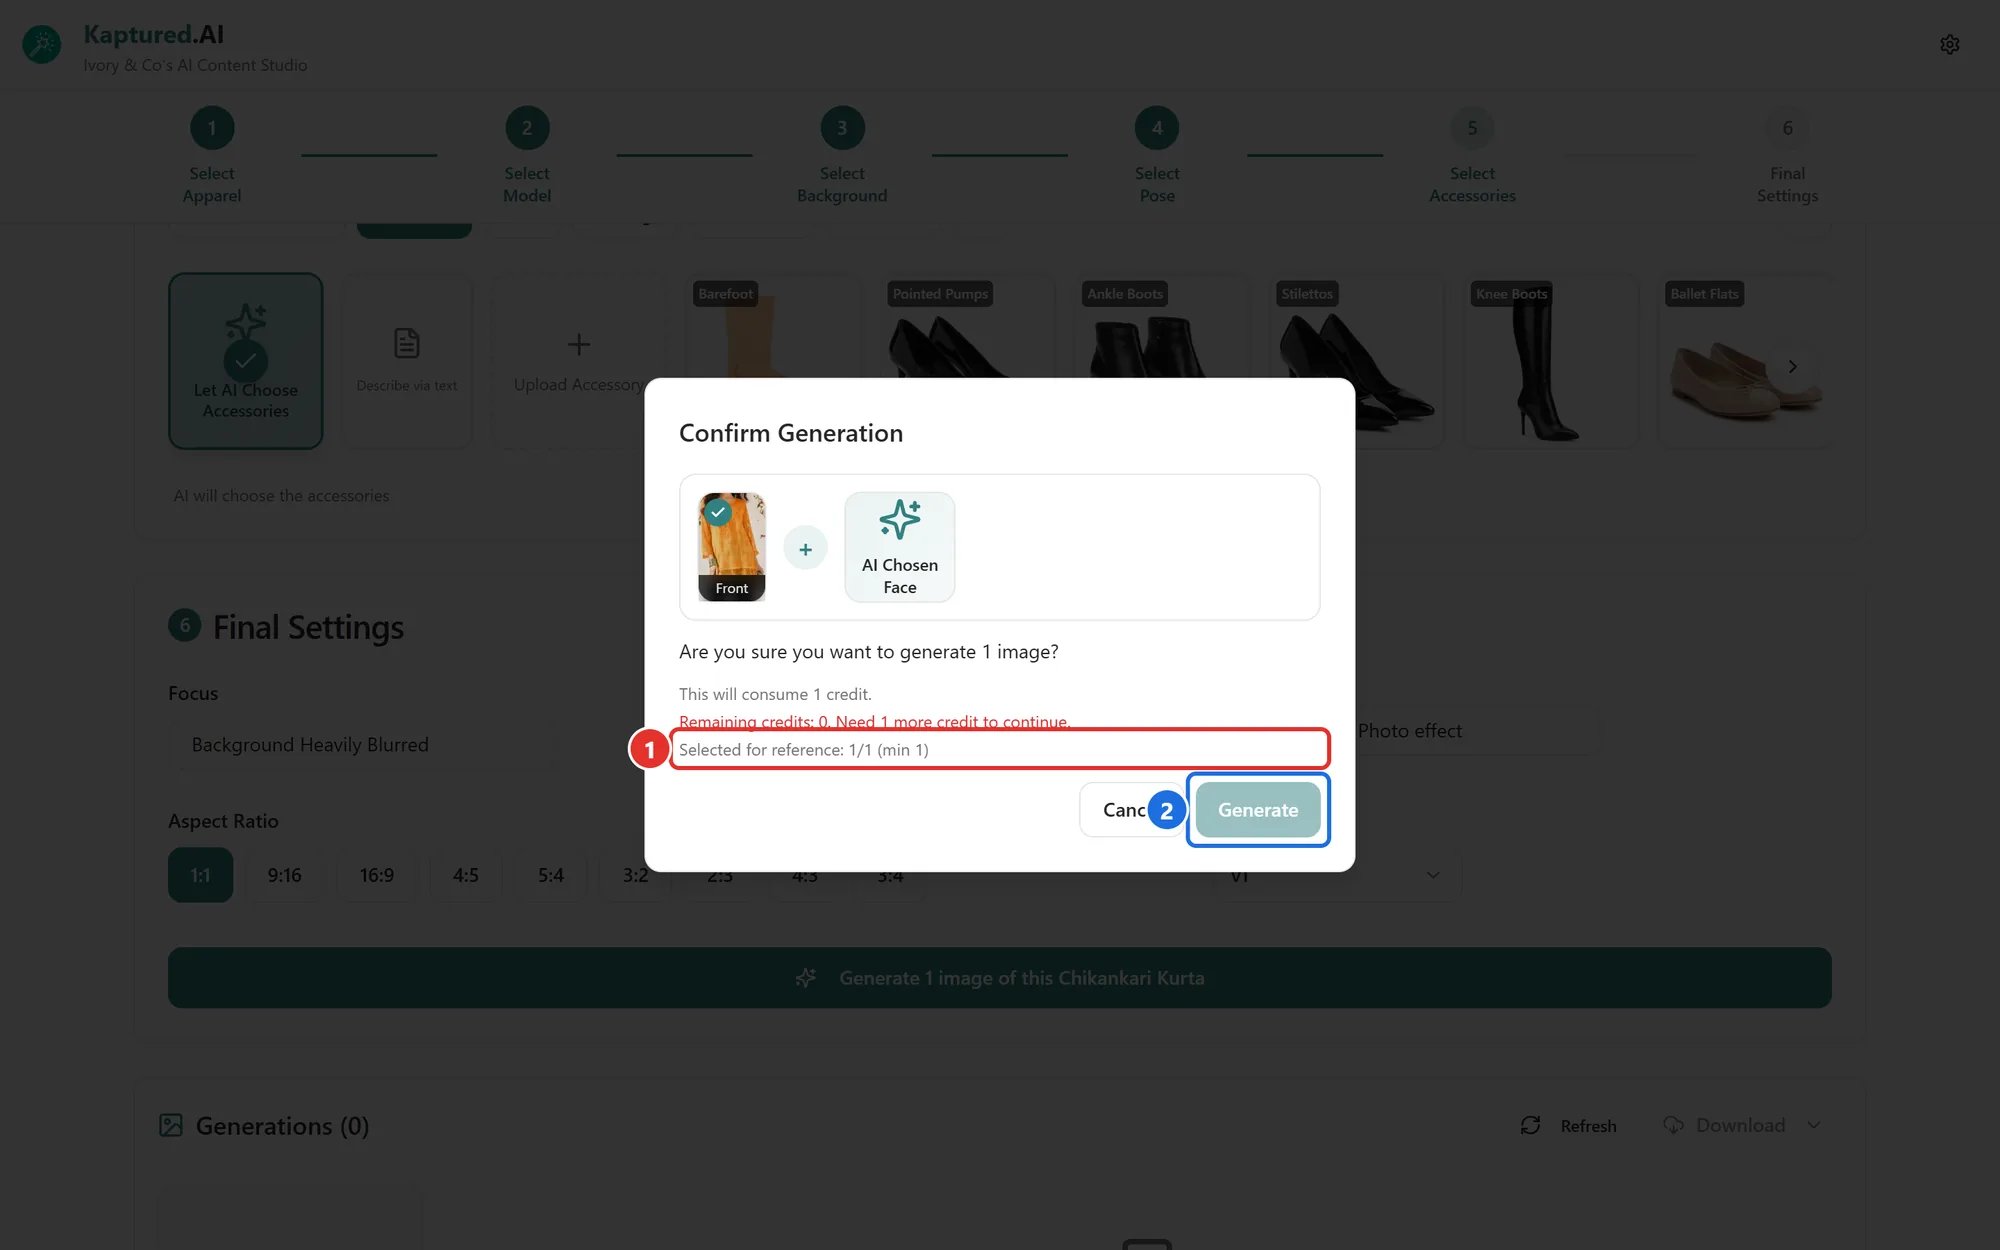
Confirm Generation: the product photos used as reference (1) and the Generate button (2). If you don't have enough credits, the dialog says how many more you need.