

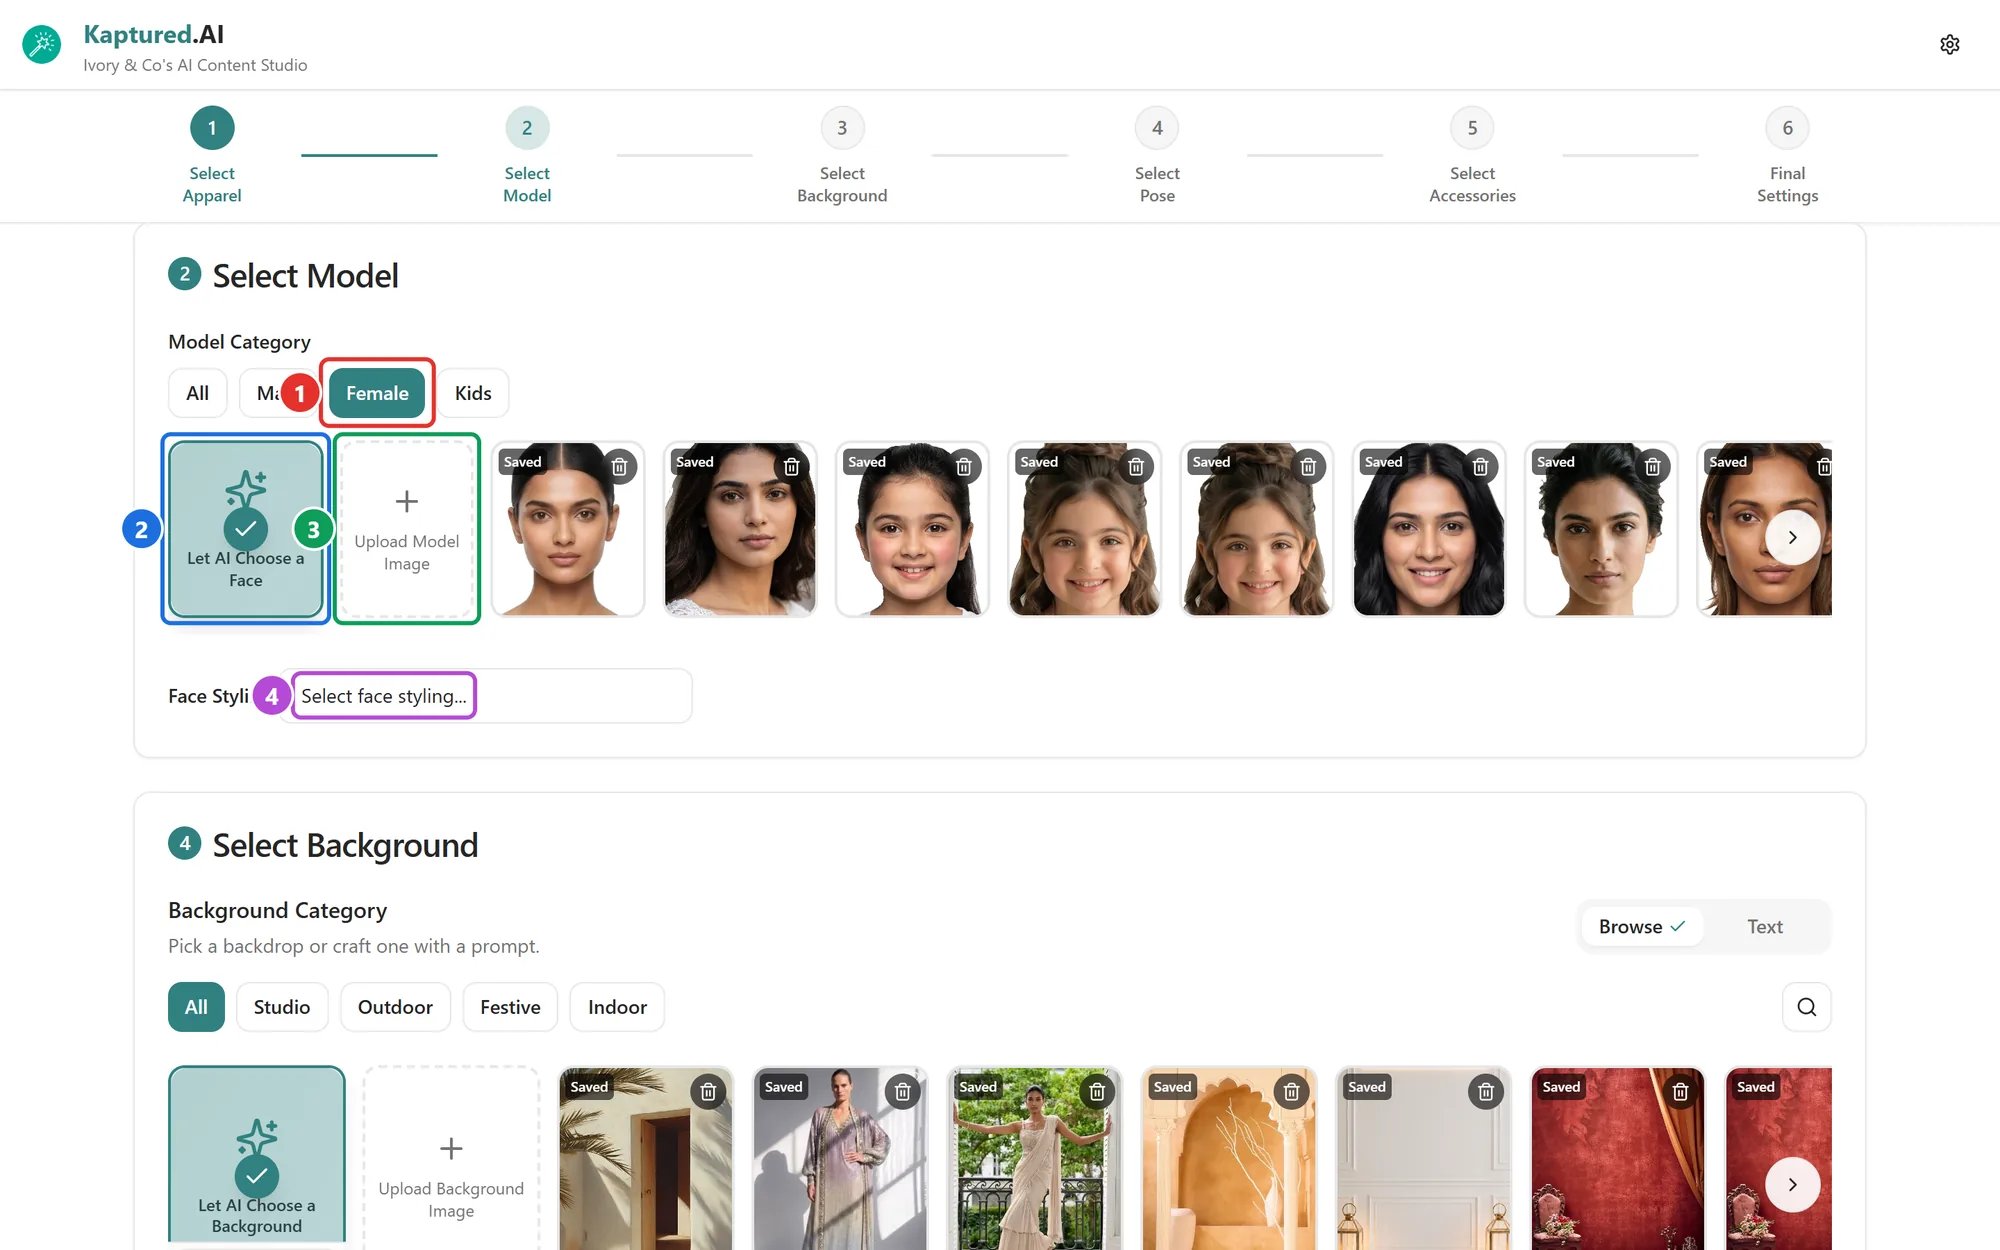
Select Model: Model Category (1), Let AI Choose a Face (2), Upload Model Image (3) and Face Styling (4). Faces you've saved show a Saved tag.
Pick from the model library
Filter by All, Male, Female or Kids (1), then click a face. The library has 27 male, 30 female and 20 kids’ faces. Let AI Choose a Face (2) picks a suitable face for the product for you.Upload your own model
Available on paid plans.- Click Upload Model Image (3) and choose a photo.
- In Crop Face for Better Results, crop to the face only:
- Crop just the face: no clothes or shoulders.
- Use a straight, front-facing photo.
- Tick Save for later to keep this face for future shoots.
- Click Confirm Crop.
If you see “Couldn’t detect a clear face, adding anyway”, the face is still used, but results are better with a clear, front-facing photo.
Face Styling
Open Face Styling (4) to fine-tune the model:- Age: Young (18 to 25), Middle-aged (26 to 35), Mature (36 to 50) or Senior (50 plus). For kids: Baby, Toddler, Child or Teen.
- Face Realism
- Beard (male models)
- Hairstyle
- Makeup