

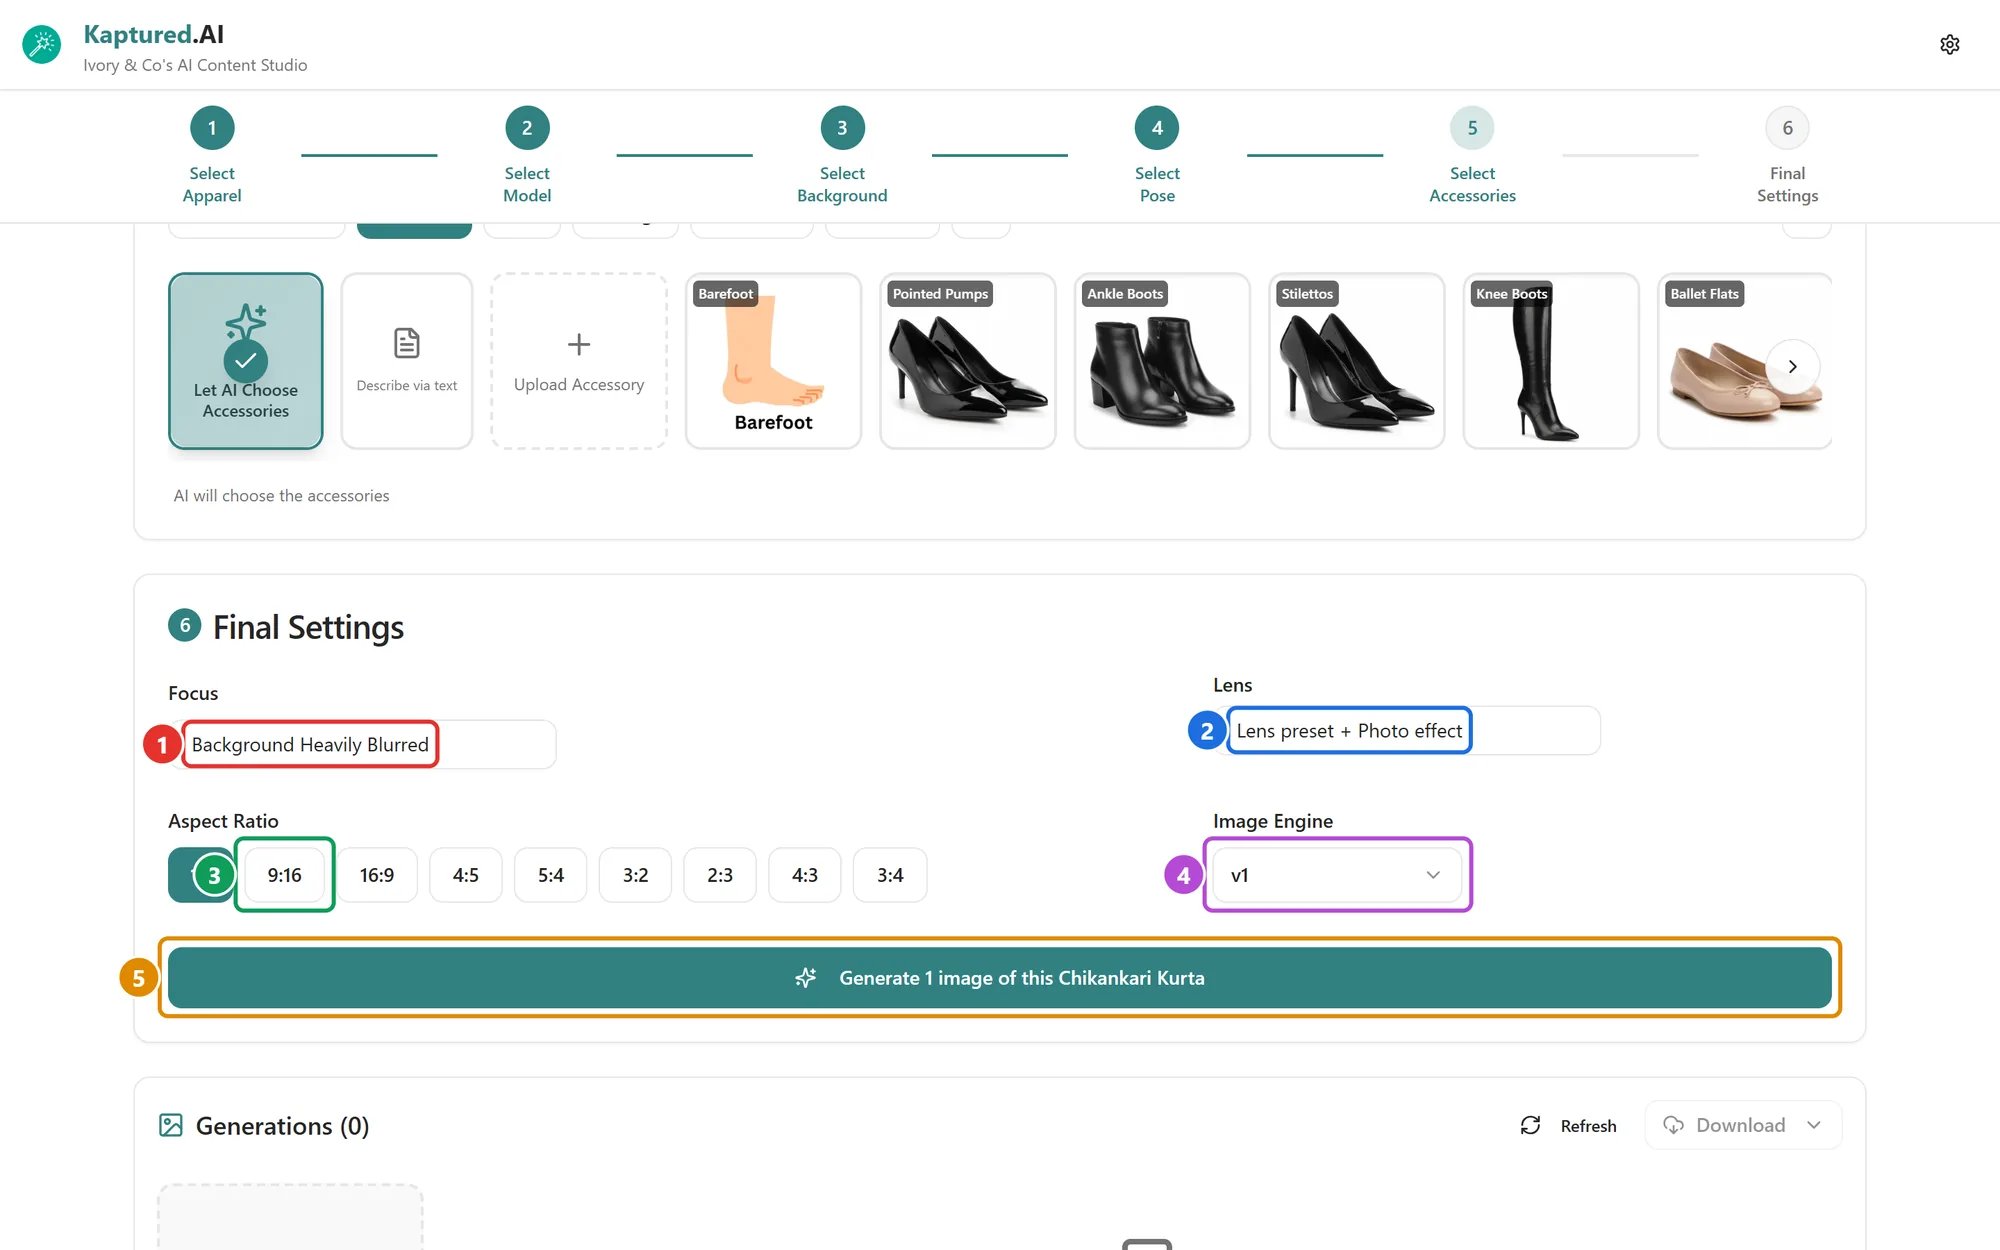
Final Settings: Focus (1), Lens (2), Aspect Ratio (3), Image Engine (4) and the generate button (5).
Focus
Open the Focus menu (1):- Background Heavily Blurred (default): the product and model stand out.
- Strong Background Bokeh: soft, round light spots in the background.
- No Hair on Clothes: keeps the model’s hair off the garment so the product stays fully visible.
Lens
Open the Lens menu (2):- Lens Preset: for clothing, Outdoor, Full Body, Studio or Creative. For jewelry, Best Overall, Luxury Look, Ecommerce or Jewelry on Model.
- Photo Effect: a color and light style, such as Clean E-Commerce Studio Look, Fashion Editorial Portra Look, Golden Hour Portrait, Sunset Backlight with Lens Flare or Fuji Classic Chrome Aesthetic.
Aspect ratio
Pick a shape (3): 1:1, 9:16, 16:9, 4:5, 5:4, 3:2, 2:3, 4:3 or 3:4. The studio remembers the last one you used.
The Free plan is limited to 1:1.
Image engines
The Image Engine menu (4) lets you pick one or more engines, each at 1K, 2K or 4K. Each engine you select makes its own image, so selecting two gives you two images to compare, and costs the sum of both. The generate button (5) updates to show how many images you’ll get.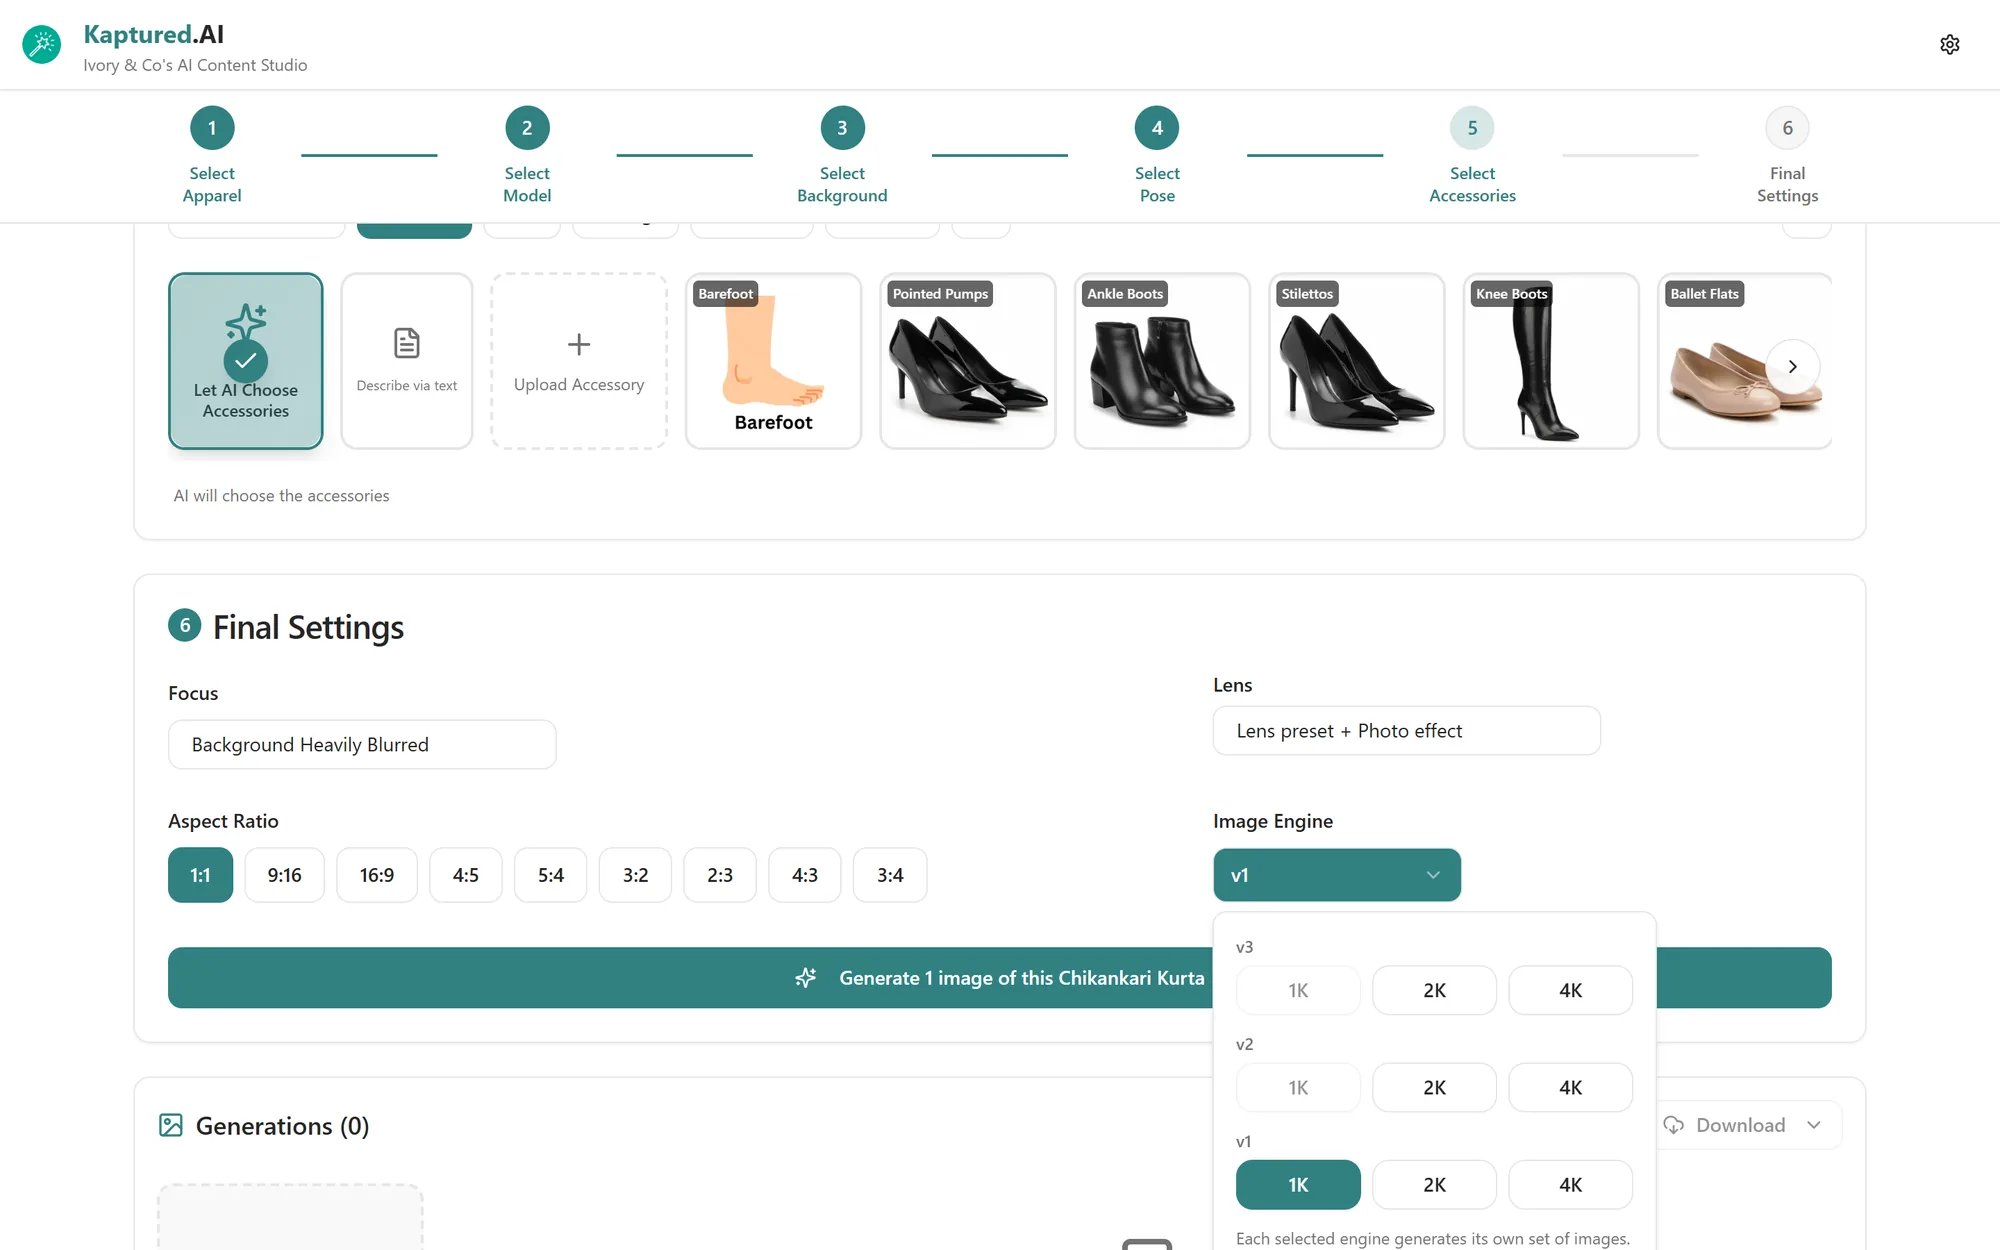
The Image Engine menu: tick an engine at the resolution you want.
Credits per image. Your account may have different rates; the confirm dialog always shows the exact cost.
- Which engines appear depends on what’s allowed in Shop Settings → Image engines. If you see “This image engine is not enabled for your shop”, turn it on there.
- The Free plan includes v1 only.