> ## Documentation Index
> Fetch the complete documentation index at: https://docs.kaptured.ai/llms.txt
> Use this file to discover all available pages before exploring further.
# Bulk Upload Products
> Add many products at once from a folder of photos, a ZIP, or a spreadsheet.
**Bulk Upload** adds many products in one go. You can drop in a folder or ZIP of photos, a CSV or Excel sheet of product details, or both.
Bulk Upload is available on paid plans, in a desktop browser. It isn't available on mobile.
Go to **Products Management → Add New Products → Bulk Upload**. The dialog has three steps: **Upload → Review & Edit → Crop Images**.
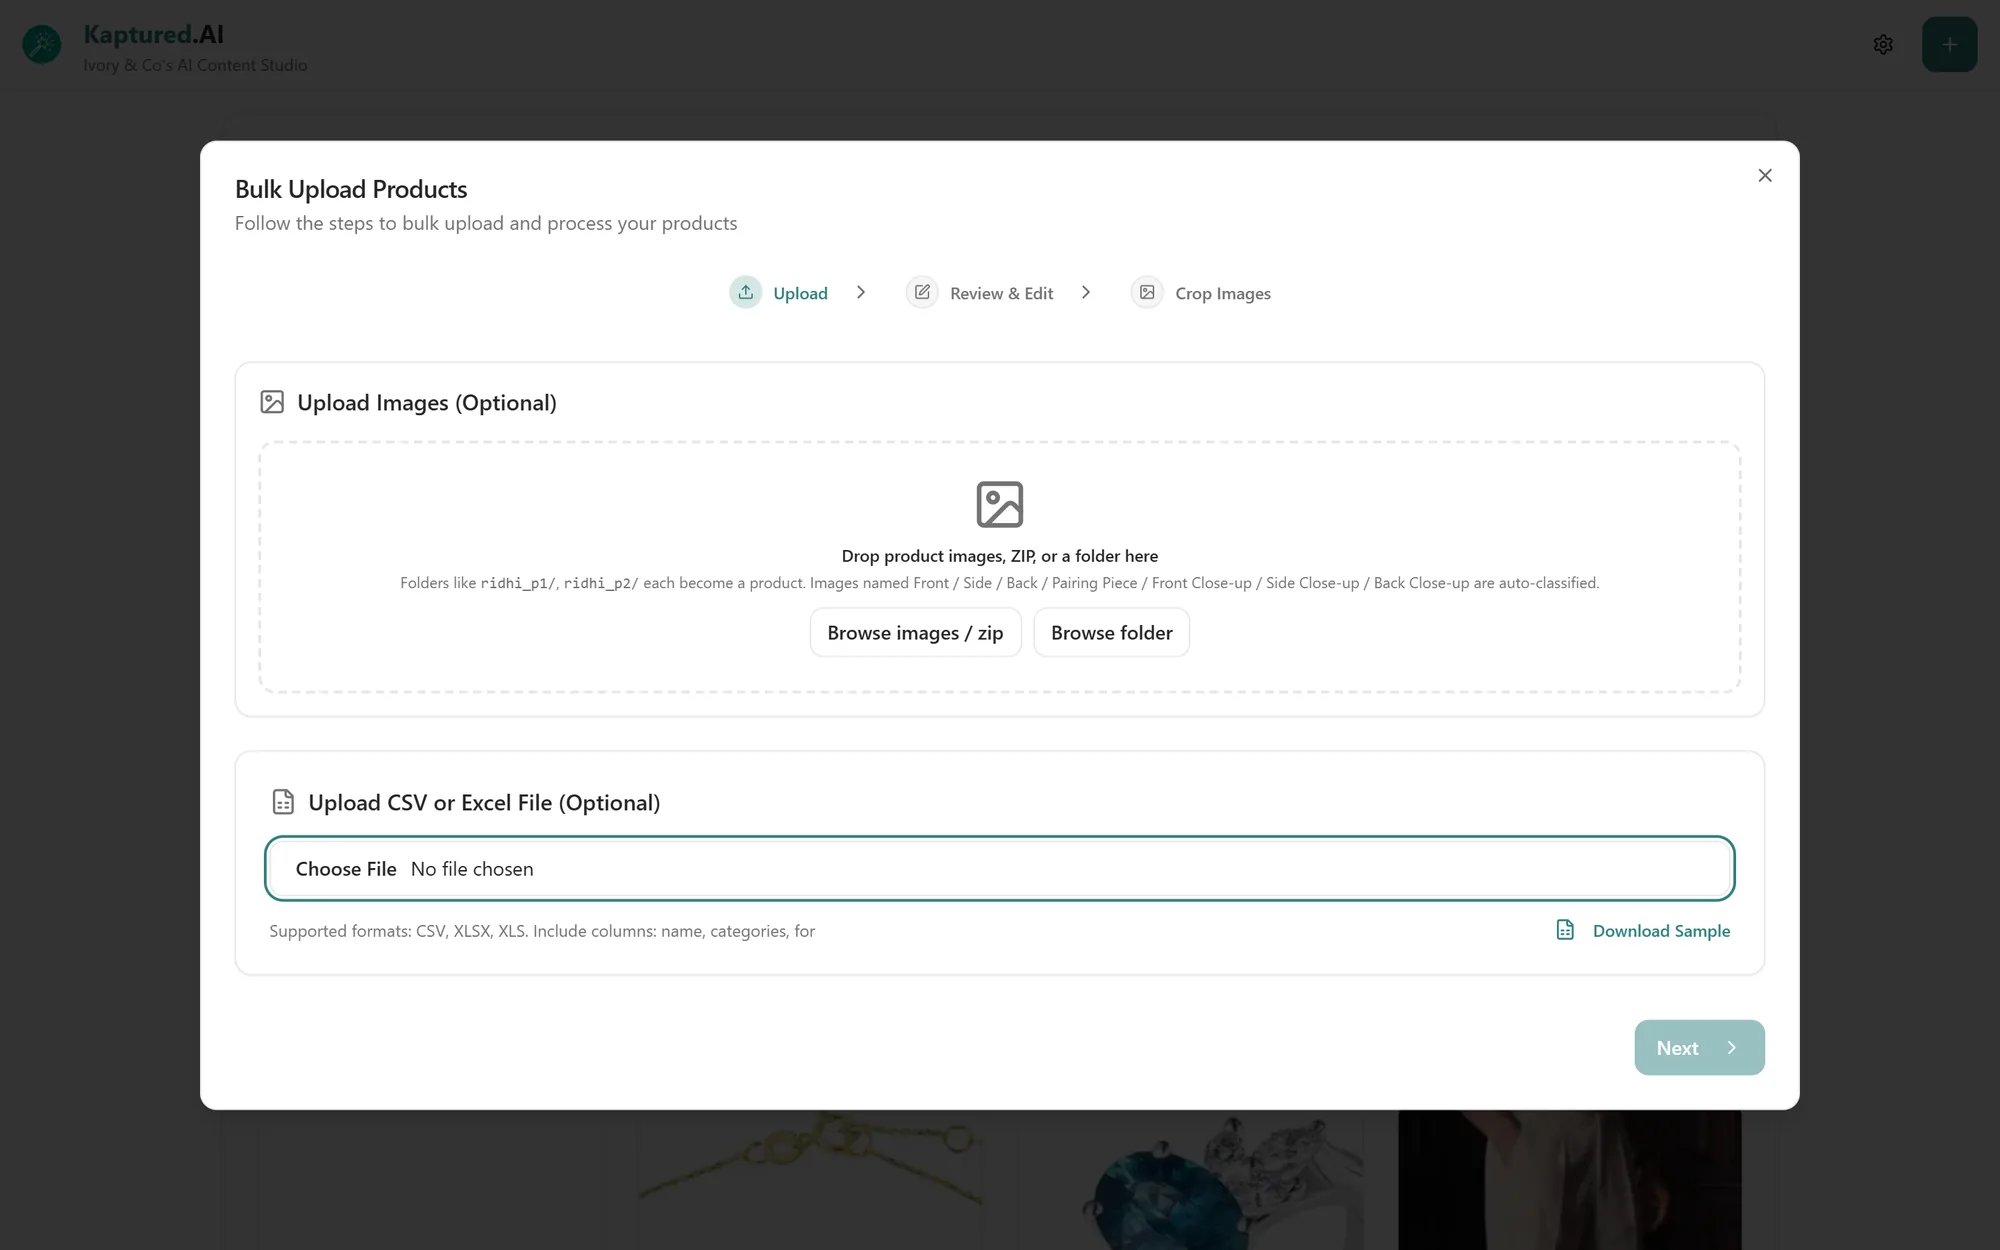 ## Step 1: Upload
You can use photos, a spreadsheet, or both. Each is optional.
### Photos: a folder or ZIP
Click **Browse folder** or **Browse images / zip**, or drop them onto the dialog.
**Put each product in its own folder.** Every folder becomes one product:
```text theme={null}
my-catalog/
├── ridhi_p1/
│ ├── Front.jpg
│ ├── Back.jpg
│ └── Front Close-up.jpg
└── ridhi_p2/
├── Front.jpg
└── Side.jpg
```
Name photos **Front**, **Side**, **Back**, **Pairing Piece**, **Front Close-up**, **Side Close-up** or **Back Close-up** and their views are set automatically. Up to 4 photos per product are used; any extra are skipped.
### Details: a CSV or Excel file
Upload a `.csv`, `.xlsx` or `.xls` file with the columns **name**, **categories** and **for**. Click **Download Sample** for a ready-made template.
## Step 2: Review & Edit
Check each product and fill in anything missing: **Name** (up to 25 characters), **For**, **Category**, **Stone Type** for jewelry, and **Images** (up to 4). Use **Remove Product** to drop one.
## Step 3: Crop Images
Click **Start Image Cropping** and crop each photo, the same way as for a [single product](/products/adding-products). Use **Skip all remaining** to accept the rest as they are.
Then click **Start AI Processing**. Progress shows as **Completed: x / y**. When it's done, each product opens in the product form one by one so you can check it before it's saved. Click **Add Product** to save it, or **Skip** to leave it out. You see **All bulk upload products have been added!** at the end.
## Troubleshooting
1. **"Please upload a CSV or Excel file"**
**✅ Solution:** Save your sheet as `.csv`, `.xlsx` or `.xls`.
2. **"No data found in file" or "Failed to parse file"**
**✅ Solution:** Start from **Download Sample**, keep the header row, and paste your products under it.
3. **Photos ended up in the wrong product.**
**✅ Solution:** Make sure each product's photos are in their own folder. Loose photos in one folder are treated as one product.
4. **Some photos were skipped.**
Only 4 photos per product are used.
**✅ Solution:** Keep the 4 best views in each folder.
## Related articles
* [How to Add a Product](/products/adding-products)
* [Managing Your Products](/products/managing-products)
* [Product Photo Tips](/products/product-photo-tips)
## Step 1: Upload
You can use photos, a spreadsheet, or both. Each is optional.
### Photos: a folder or ZIP
Click **Browse folder** or **Browse images / zip**, or drop them onto the dialog.
**Put each product in its own folder.** Every folder becomes one product:
```text theme={null}
my-catalog/
├── ridhi_p1/
│ ├── Front.jpg
│ ├── Back.jpg
│ └── Front Close-up.jpg
└── ridhi_p2/
├── Front.jpg
└── Side.jpg
```
Name photos **Front**, **Side**, **Back**, **Pairing Piece**, **Front Close-up**, **Side Close-up** or **Back Close-up** and their views are set automatically. Up to 4 photos per product are used; any extra are skipped.
### Details: a CSV or Excel file
Upload a `.csv`, `.xlsx` or `.xls` file with the columns **name**, **categories** and **for**. Click **Download Sample** for a ready-made template.
## Step 2: Review & Edit
Check each product and fill in anything missing: **Name** (up to 25 characters), **For**, **Category**, **Stone Type** for jewelry, and **Images** (up to 4). Use **Remove Product** to drop one.
## Step 3: Crop Images
Click **Start Image Cropping** and crop each photo, the same way as for a [single product](/products/adding-products). Use **Skip all remaining** to accept the rest as they are.
Then click **Start AI Processing**. Progress shows as **Completed: x / y**. When it's done, each product opens in the product form one by one so you can check it before it's saved. Click **Add Product** to save it, or **Skip** to leave it out. You see **All bulk upload products have been added!** at the end.
## Troubleshooting
1. **"Please upload a CSV or Excel file"**
**✅ Solution:** Save your sheet as `.csv`, `.xlsx` or `.xls`.
2. **"No data found in file" or "Failed to parse file"**
**✅ Solution:** Start from **Download Sample**, keep the header row, and paste your products under it.
3. **Photos ended up in the wrong product.**
**✅ Solution:** Make sure each product's photos are in their own folder. Loose photos in one folder are treated as one product.
4. **Some photos were skipped.**
Only 4 photos per product are used.
**✅ Solution:** Keep the 4 best views in each folder.
## Related articles
* [How to Add a Product](/products/adding-products)
* [Managing Your Products](/products/managing-products)
* [Product Photo Tips](/products/product-photo-tips)