> ## Documentation Index
> Fetch the complete documentation index at: https://docs.kaptured.ai/llms.txt
> Use this file to discover all available pages before exploring further.
# Adding and Managing Customers
> Save your customers' photos so you can show them wearing your products with Virtual Try-On.
A **customer** is a real person, such as a shopper at your boutique. Save their photo once, and you can generate images of them wearing any of your products. See [Styling Customers with Virtual Try-On](/customers/styling-customers).
Customers are available to **Apparel** shops with **Enable Virtual Try-On Customers** turned on in [Shop Settings](/getting-started/platform-overview/shop-settings). The Free plan allows up to 3 customers.
Only add people who have agreed to have their photo used.
## Add a customer
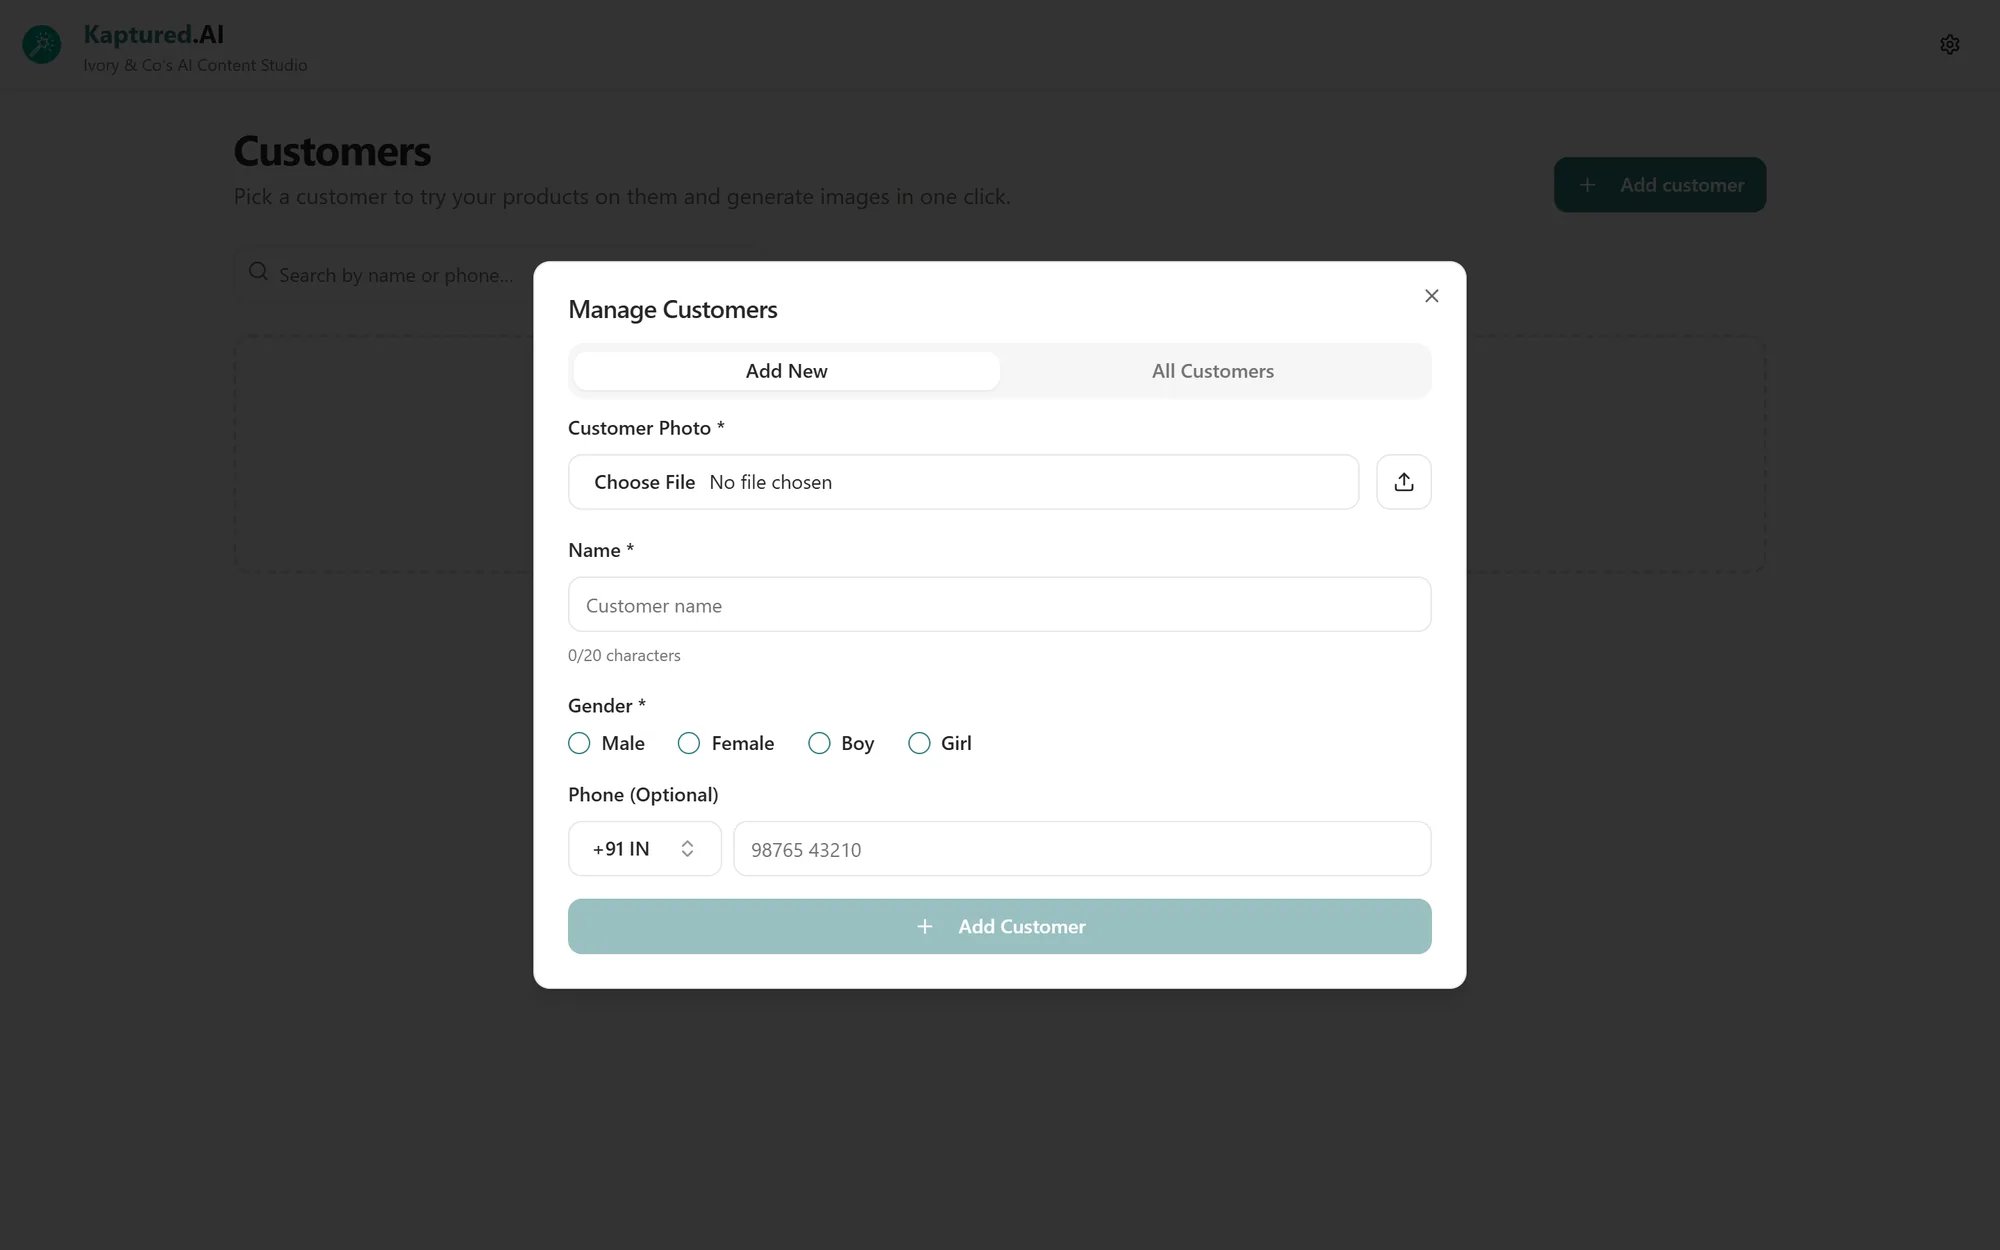
1. Go to **Style Customers** and click **Add customer**. The **Manage Customers** dialog opens on the **All Customers** tab.
2. Switch to the **Add New** tab.
3. **Customer Photo:** upload or drop a photo (JPG, PNG, WebP, AVIF or HEIC) and crop it in **Crop Image**. Click **Confirm Crop**.
4. **Name:** up to 20 characters.
5. **Gender:** **Male**, **Female**, **Boy** or **Girl**.
6. **Phone (Optional):** choose the country code and enter the number.
7. Click **Add Customer**.
 You're taken straight to the new customer's profile, ready to style them.
## A good customer photo
* A clear, well-lit, front-facing photo.
* The face and body visible, not cut off at the head.
* Just one person in the photo.
## Find a customer
On **Style Customers**, use **Search by name or phone…**. Click a card to open that customer's profile.
## Edit or delete a customer
Open **Customers Management** from the profile menu (or **Add customer** on the Style Customers page) and go to **All Customers**. Each row has **Edit** and **Delete** buttons.
Deleting a customer can't be undone.
## Related articles
* [Styling Customers with Virtual Try-On](/customers/styling-customers)
* [Shop Settings](/getting-started/platform-overview/shop-settings)
* [Pricing Plans](/subscription-and-billing/pricing-plans)
You're taken straight to the new customer's profile, ready to style them.
## A good customer photo
* A clear, well-lit, front-facing photo.
* The face and body visible, not cut off at the head.
* Just one person in the photo.
## Find a customer
On **Style Customers**, use **Search by name or phone…**. Click a card to open that customer's profile.
## Edit or delete a customer
Open **Customers Management** from the profile menu (or **Add customer** on the Style Customers page) and go to **All Customers**. Each row has **Edit** and **Delete** buttons.
Deleting a customer can't be undone.
## Related articles
* [Styling Customers with Virtual Try-On](/customers/styling-customers)
* [Shop Settings](/getting-started/platform-overview/shop-settings)
* [Pricing Plans](/subscription-and-billing/pricing-plans)